Friday, 28 November 2014
Tutorials I Have Looked at While Editing- Compiled List
In order to get practice in editing, and using the software, I downloaded the 30 day free trail on my laptop at home. After making my first draft edit, I found this video explaining how to export the edit and the different types of formats the video could be exported into. This was just a simple video to help me understand the different aspects of video.
I used this tutorial to help me create a sepia effect. Watching this video helped me understand each effect I had to use, how you apply it to the sequence and change different aspects of it.
This is just another effects tutorial, explaining additional effects I could add to the video to enhance the old film look. While I haven't followed this as much as the other, it has helped me understand the types and uses of different tools on Premier Pro.
This tutorial came in handy when I was finalizing my first draft. It simply shows how to make a title fade in and out. I found it useful because, although I knew how to add a title, I did not know how to accomplish simple effects like this.
Thursday, 20 November 2014
Editing
Now that I have the basic knowledge of using Premier Pro, I feel confident and comfortable to begin editing my music video together. I plan on using my media lessons and any spare frees/lunchtimes to edit and have my first draft completed by the 12th December.
Sunday, 16 November 2014
Questionnaire for Rough Edit 2

Again, the results of this were great and has given me confidence in editing my first draft together as I know that what I want to do is going to work and look good.
Saturday, 15 November 2014
Rough Edit 2
Thursday, 13 November 2014
Questionnaire for Rough Edit 1

The outcome for my first rough edit is really good. Now that I know that people think it has been edited well, I feel comfortable continuing to do another rough edit before I put together my final first draft.
Wednesday, 12 November 2014
Rough Edit 1
This is my first edit using Premier Pro. I have only edited together the first few shots of my video to compare it to my storyboard and figure out if I have the timings correct. I think this rough edit is successful as the outcome is what I wanted and I will now have no problem editing the rest together. Doing this has given a bit of practice use the editing software and I am now more comfortable and confident with the rest of the process of editing. I am going to produce a small survey in order to get other's feedback of the edit, allowing me to make any changes early in the process. Having other people's opinions will also hopefully give me constructive criticism which will help me improve my final edit- it may also be that there is nothing I should change. I am also planning on producing another rough edit which will give me practice in syncing the audio and video together.
Friday, 7 November 2014
Creating and Adding a Title
Using the tutorial, shown at the bottom of this, I have added a title to the beginning shot I want to use for my music video. I will be conducting a small tally on whether people think the colour and font I have chosen suit the genre of the video and looks good. Below is a step-by-step of how I did this.
I used this simple and easy to understand tutorial to help me discover the effect of making a title fade in and out. Before watching this tutorial I had no idea to accomplish this.
Tuesday, 4 November 2014
Editing A Sepia Effect Onto A Video Clip

Firstly, I searched 'RGB' in the effects search box and dragged and drop 'RGB Colour Corrector onto the video clip, on the timeline, of the first shot of the video. I then change the Gamma to 1.6, Pedestal to 0.2 and Gain to 0.8. This changed the overall brightness and levels of darkness of the image.
Gamma: Affects the slope in the colour curve to lighten or darken the image overall, with minimal effect on the bright and dark areas already present in the image.
Pedestal: Affects the low-end cut off value of the curve. Increasing the Pedestal value pushes pixels towards the lighter end of the curve. The Pedestal value is added to the colour value of each pixel.
Gain: Affects the high-end cut off value of the curve. Increasing the Gain value lightens the image uniformly.


 Next, I searched 'Tint' and dragged and drop this onto the video clip. I selected the colour picker box next to 'Map Black To' and chose a muddy brown colour (as told and shown in the tutorial). I did the same with 'Map White To' but chose a brighter colour. With the HTML code of each colour, I can copy and paste it when adding the effect to other clips instead of trying to match the colour. I then made sure to change the Amount to Tint percentage so it didn't look like a block colour had just been put over the video. I changed this to 40%- also suggested by the tutorial. Finally, I rendered the footage. by pressing enter, in order for the video to play smoothly.
This is the tutorial I used to help alter the colour of the video. While the colour of my video isn't the same as that in the video, I think it still effective.
Monday, 3 November 2014
Introduction to Editing
Since I have never used any form of editing software before, I have no idea where to start. I found this video which is a simple introduction to the basics of editing. I will also be looking at downloading a 30 day free trial of Premier Pro in the next week or so to get some basic practice, while I continue to research editing techniques, before I use an editing suite in college.
Saturday, 1 November 2014
Title Fonts
Since I want to edit a title onto the beginning shot of my music video, I have looked into the different fonts I could use, how this can be done and some people who commonly use this technique.
Here are examples of a few directors whose videos always have text at the beginning of the music videos.
Alexander Brown-http://brownboy.co.uk/music-videos/


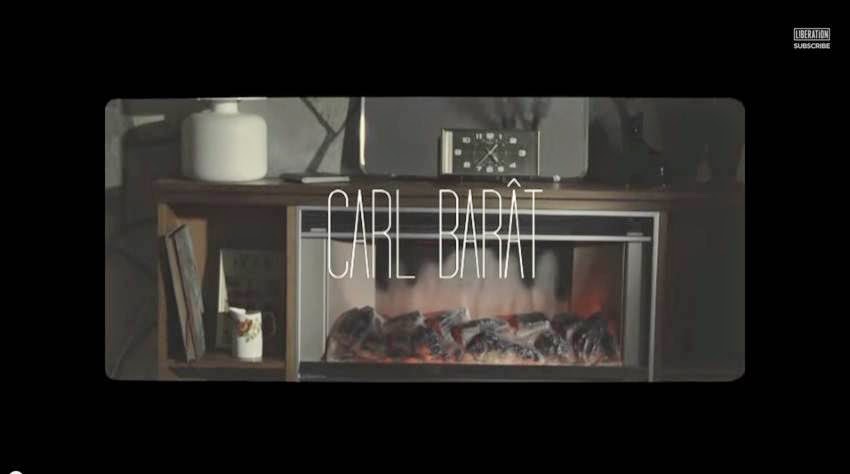
I particularly like this use of title as the fonts used are usually quite subtle. In some videos, the use of a title introduces it as a short-film or just allows the audience to understand that there is a narrative. For example, in Carl Barat's 'Run With The Boys' the video begins with 'Carl Barat' 'Presents' 'Run With The Boys' in three separate shots that then slowly introduce the beginning of the narrative.
Since my own video is going to have a narrative, it may therefore be useful if I add a title.
http://fontsinuse.com/in/1/industries/43/music
This is a great site to look through because the site shows the names of the fonts used on different artists' albums. While they are for music videos, it may help me when looking at fonts for my digipak.
This is YouTube video I found giving a quick tutorial on how to add text to a video on Premiere Pro.
https://www.video2brain.com/en/lessons/add-a-simple-title-some-fades-and-music
This is another tutorial I found which goes further and shows how to add to make the text fade in and out. This would be useful to do on my video as it begins quite slow, therefore I should make the title appear slowly to give a sense of flow.
Here are examples of a few directors whose videos always have text at the beginning of the music videos.
Alexander Brown-http://brownboy.co.uk/music-videos/
I particularly like this use of title as the fonts used are usually quite subtle. In some videos, the use of a title introduces it as a short-film or just allows the audience to understand that there is a narrative. For example, in Carl Barat's 'Run With The Boys' the video begins with 'Carl Barat' 'Presents' 'Run With The Boys' in three separate shots that then slowly introduce the beginning of the narrative.
Since my own video is going to have a narrative, it may therefore be useful if I add a title.
http://fontsinuse.com/in/1/industries/43/music
This is a great site to look through because the site shows the names of the fonts used on different artists' albums. While they are for music videos, it may help me when looking at fonts for my digipak.
This is YouTube video I found giving a quick tutorial on how to add text to a video on Premiere Pro.
https://www.video2brain.com/en/lessons/add-a-simple-title-some-fades-and-music
This is another tutorial I found which goes further and shows how to add to make the text fade in and out. This would be useful to do on my video as it begins quite slow, therefore I should make the title appear slowly to give a sense of flow.
Subscribe to:
Posts (Atom)